The chocoholic’s favourite day of the year is here and we have plenty to celebrate! So, grab your favourite choccie and delve into our handy guide and recipes
Today is arguably the only day that matters on every chocoholic’s calendar – World Chocolate Day. Our phones are off, out of office replies on and the chocolate cupboard (we all have one) is well and truly stocked with our favourite brand.
But, do we really know how it got there? And I’m not talking about the fact you went out to your local shop and bought it yourself.
The production behind chocolate is truly fascinating and is guaranteed to make you appreciate it even more – if that’s possible!
We’ve also featured an array of chocolate-based recipes these past few weeks for you to get stuck into from two classic chocolate cakes courtesy of Aunt Kate, a gluten-free chocolate chunk cake, and even this Oreo cookie dough skillet recipe that we bet you won’t be able to stop thinking about.
Or why not order some chocolate from a nearby business and help support the local community while also enjoying some fantastic products?
This guide is for everyone who considers themself to be a chocoholic, or even if you have a loved one who has a strong passion for this “food of the Gods”.
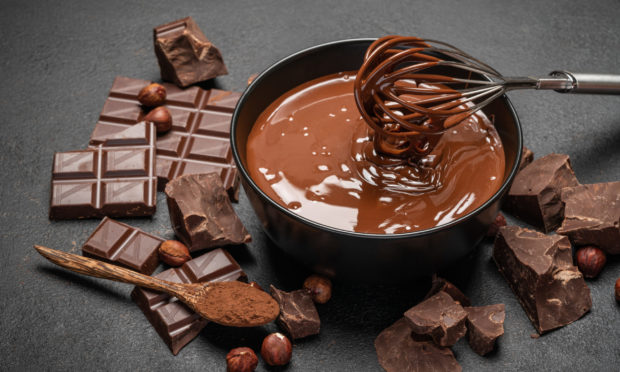
A brief history of chocolate and how it’s made
In the mid-1700s professional taxonomer (the occupation of naming things) Carl Linnaeus named the tree that produces chocolate pods as “Theobroma cacao” (which means ‘food of the gods’), and from then the magic was born.
Such trees, however, are only found in tropical regions near the equator, meaning it’s sadly not possible for us to grow chocolate in our own gardens. Though more than 60 countries grow cacao, the original substance which then becomes chocolate, five of them collectively account for almost 80% of its production – Ghana, Ivory Coast, Nigeria, Brazil and Indonesia.
These trees, provided they aren’t destroyed by mankind, can continue producing ” chocolate pods for up to 100 years with only three in every 1,000 trees able to do so at any one time. It’s a labour intensive process and there are also various stages the chocolate has to go through before it becomes the yummy substance we’ve become so accustomed to.
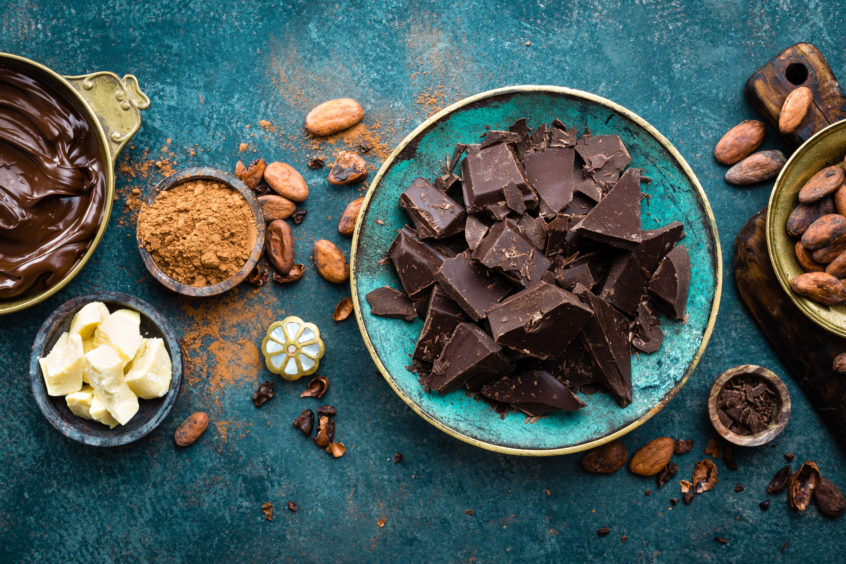
Thankfully, chocolate is not seasonal and the trees flower throughout the year and always need to be harvested by hand. From chocolate pods come small seeds, not too dissimilar in size to almonds. These seeds are often surrounded by pulp, which needs to be removed via process of fermentation before the seeds can be roasted into chocolate.
It can take up to a week for the fermentation process to be completed, with the pulp reaching temperatures of 120 degrees before it melts away. Once it has done so, the seeds, or beans, are then placed out in the sun to dry for up to five days, while being turned over numerous times a day.
From there, the seeds are taken to chocolate factories where they are roasted and grinded down to create cocoa nibs and into a thick paste. The paste is what we have come to know as chocolate and can be made into the sweet version we know in a variety of ways.
How can I make chocolate at home?
There are a variety of recipes online that show you how to make chocolate at home – all of which start by requiring you to purchase either some cocoa butter and/or unsweetened cocoa powder.
Some recipes also use coconut oil and some sort of sweetner such as honey, agave or maple syrup, but they are all things that are relatively easy to source from your local supermarket or health food store.
Then it’s a case of melting, mixing and refrigerating and you have your very own chocolate. Don’t forget to add your favourite toppings or fillings, such as raisins, nuts, marshmallows, berries, biscuit or just leave them plain.
Here is a recipe for making milk chocolate using only four ingredients: cocoa powder, icing sugar, milk powder (vegan varieties such as oat and soy can be used here) and coconut oil.
Three recipes using cocoa
Chocolate loaf
(Serves 6 people or, more likely, one chocolate fan)
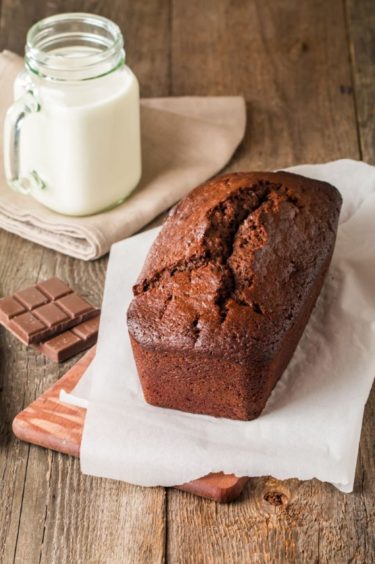
Ingredients
- 200g salted butter, soft
- 200g caster sugar
- 4 medium eggs
- 160g self-raising flour
- 40g cocoa powder
For the topping:
- 100g-200g dark chocolate, depending on how much of a chocoholic you are.
Method
- First, preheat your oven to 160C/140C fan/gas 2. It needs to be quite low, as the loaf will be deep. Line a 2lb loaf tin with a paper loaf-tin liner, or with a crumpled square of baking paper.
- Into a large bowl, weigh your butter and caster sugar. Use an electric mixer or wooden spoon to beat these together until really light and fluffy.
- Add your eggs, one at a time, beating well after each addition. Then, finally, add your flour and cocoa. There’s no need to sieve it. Fold this in gently with a large spoon, scooping everything from the bottom of the bowl until smooth.
- Place the mixture into your lined loaf tin and bake in your oven for 40-60 minutes. Check after 40 and see how it’s doing – if it’s still wobbly, it’s got a way to go. If it seems set, stick a skewer in and see if it comes out clean. If it does, it’s done.
- Leave it to cool in the tin – there’s no need for a cooling rack. When it’s cool or nearly there, melt the chocolate in a bowl in the microwave using just 15-second bursts.
- When it’s nearly all melted, let it sit out for the rest to amalgamate. Drizzle this all over the loaf and let harden. Do not put it in the fridge. Slice with a hot knife.
Recipe by James Morton for Graham’s the Family Dairy.
Chocolate clementine cake
(Serves 8, though there’s a high chance you won’t want to share it)
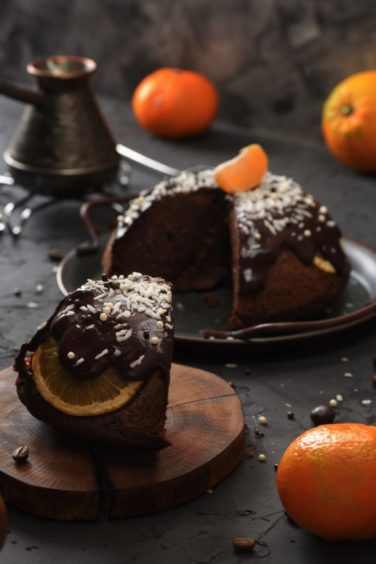
Ingredients
For the sponge:
- 150g slightly salted butter, soft
- 150g caster sugar
- Finely grated zest of two clementines
- 3 eggs
- 100g plain flour
- 100g ground almonds
- 1 ½ tsp baking powder
- 1 tbsp of cocoa powder
For the ganache:
- 200g dark chocolate
- 200g double cream
For the candied clementine peel (optional):
- Juice of two clementines
- 50g caster sugar
- Skin of two clementines
Method
- First, preheat your oven to 180C/160C/gas 4. Line the bottom two 7-8inch cake tins with baking paper, and grease around the sides plenty.
- Into a large bowl, place your butter. Zap it in the microwave if it isn’t soft. Add in your caster sugar and your clementine zest, and beat until smooth and fluffy.
- Add your eggs, one at a time, beating after each addition. Finally, stir in your flour, almonds, baking powder and cocoa powder until your mix is just combined – you don’t want it totally smooth, but no bare flour should be visible.
- Transfer your mix to your cake tins and bake for 20-30 minutes, or until bouncy when pressed lightly on top. Remove to let cool in tins.
- As they cool, make your ganache. Into a bowl, break your chocolate into manageable chunks. In a pan, place your double cream. Bring your double cream to a simmer (watch it doesn’t boil over), then pour this on top of your chocolate. Stir together to combine.
- As your cakes and your ganache cool, you can make your optional candied peel. Juice two clementines into a saucepan, then cut their peel into strips and add that in too. Add your sugar, then cover with water. Bring to the simmer while you assemble your cake.
- Place one sponge on a plate or cake stand, then cover in about a third of your ganache (zap it in the microwave if it has solidified). Add your other sponge, upside-down if you want a flat top. Cover this in the rest of your ganache so it drips down the side.
- As your peel simmers you’ll notice it become translucent – once it has reached this stage, remove it from its hot liquid (beware of hot sugar burns) and stack it in the middle of the cake. Let the ganache set.
Recipe by James Morton for Graham’s the Family Dairy.
Chocolate muffins
(Makes 12)
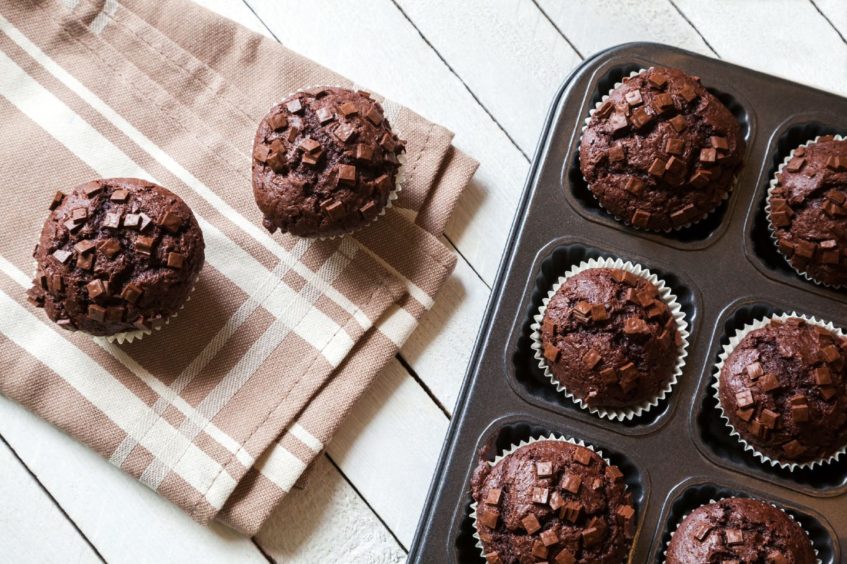
Ingredients
- 175g self raising flour
- 50g cocoa powder
- 1 tsp baking powder
- 175g dark brown, soft sugar
- 250g tub of Graham’s Quark
- 25g chocolate chunks or drops
- 75ml sunflower oil
- 2 large free range eggs
Method
- Preheat the oven to 180C/Fan 160C/gas 4. Line a deep muffin tray with paper cases.
- Sift the flour, cocoa and baking powder into a large bowl, stir in the sugar. Add the Quark, oil and eggs, then use an electric whisk to beat all the ingredients together for about a minute until they are smooth and fluffy. Stir in the chocolate chunks or chips.
- Divide the mixture between the muffin cases and bake for 25 minutess or until they are risen and firm to touch. Serve warm or cold.
Recipe by Jean Graham.