Calendar An icon of a desk calendar. Cancel An icon of a circle with a diagonal line across. Caret An icon of a block arrow pointing to the right. Email An icon of a paper envelope. Facebook An icon of the Facebook "f" mark. Google An icon of the Google "G" mark. Linked In An icon of the Linked In "in" mark. Logout An icon representing logout. Profile An icon that resembles human head and shoulders. Telephone An icon of a traditional telephone receiver. Tick An icon of a tick mark. Is Public An icon of a human eye and eyelashes. Is Not Public An icon of a human eye and eyelashes with a diagonal line through it. Pause Icon A two-lined pause icon for stopping interactions. Quote Mark A opening quote mark. Quote Mark A closing quote mark. Arrow An icon of an arrow. Folder An icon of a paper folder. Breaking An icon of an exclamation mark on a circular background. Camera An icon of a digital camera. Caret An icon of a caret arrow. Clock An icon of a clock face. Close An icon of the an X shape. Close Icon An icon used to represent where to interact to collapse or dismiss a component Comment An icon of a speech bubble. Comments An icon of a speech bubble, denoting user comments. Comments An icon of a speech bubble, denoting user comments. Ellipsis An icon of 3 horizontal dots. Envelope An icon of a paper envelope. Facebook An icon of a facebook f logo. Camera An icon of a digital camera. Home An icon of a house. Instagram An icon of the Instagram logo. LinkedIn An icon of the LinkedIn logo. Magnifying Glass An icon of a magnifying glass. Search Icon A magnifying glass icon that is used to represent the function of searching. Menu An icon of 3 horizontal lines. Hamburger Menu Icon An icon used to represent a collapsed menu. Next An icon of an arrow pointing to the right. Notice An explanation mark centred inside a circle. Previous An icon of an arrow pointing to the left. Rating An icon of a star. Tag An icon of a tag. Twitter An icon of the Twitter logo. Video Camera An icon of a video camera shape. Speech Bubble Icon A icon displaying a speech bubble WhatsApp An icon of the WhatsApp logo. Information An icon of an information logo. Plus A mathematical 'plus' symbol. Duration An icon indicating Time. Success Tick An icon of a green tick. Success Tick Timeout An icon of a greyed out success tick. Loading Spinner An icon of a loading spinner. Facebook Messenger An icon of the facebook messenger app logo. Facebook An icon of a facebook f logo. Facebook Messenger An icon of the Twitter app logo. LinkedIn An icon of the LinkedIn logo. WhatsApp Messenger An icon of the Whatsapp messenger app logo. Email An icon of an mail envelope. Copy link A decentered black square over a white square.

‘You can actually see the likeness’: Force unearths story of Fife copper who was real-life inspiration for PC Murdoch, Oor Wullie’s nemesis

Fifer PC Sandy Marnoch was the inspiration for PC Murdoch of Oor Wullie fame.

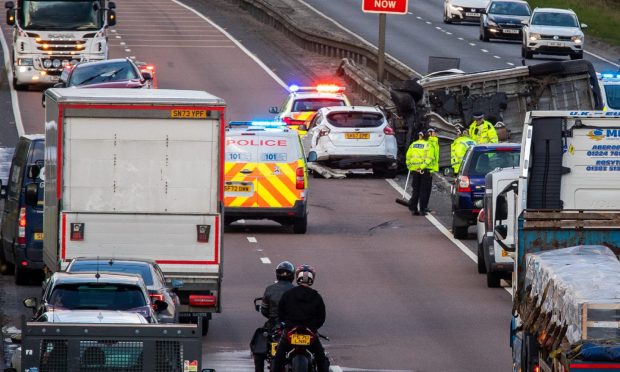
Fascinating tales from the history of Fife policing have been rooted out in a spring clean, including that of the real life PC Murdoch.

A photograph of the kingdom copper who inspired Oor Wullie’s nemesis has been dusted down, alongside that of the only Fife officer to be shot on duty and the story of the police who set sail for the Arctic Circle in pursuit of a murderer.

They were among a series of artefacts found during a clear-out of the museum in Police Scotland’s Fife headquarters in Glenrothes, formerly the HQ of Fife Constabulary.

The exhibits, also including a 120-year-old piano used for Sunday services, are now back on display to allow recruits to Fife’s Division to learn about the history of local policing.

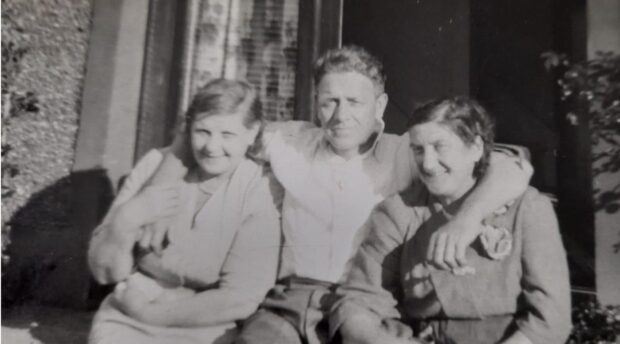
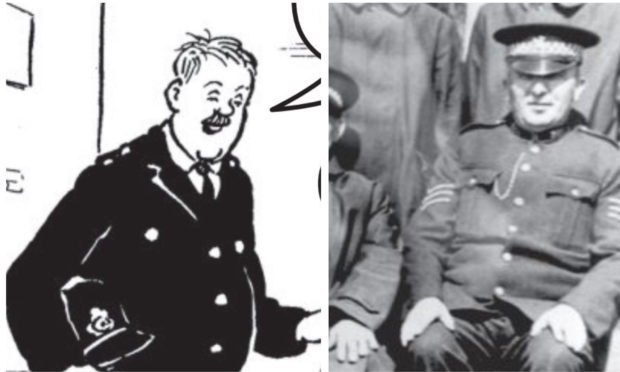
Superintendent Sandy Brodie, who was among a team involved in restoring the archive, was delighted to find the picture of PC Sandy Marnoch with The Broons and Oor Wullie creator Dudley D Watkins, who based the comic constable on him.

PC Sandy Marnoch, front right, and Dudley D Watkins (back, third from right).

He said: “It was sad that this stuff was all piled up and no one had the opportunity to have a look.

“It’s the history of policing in Fife and I think it’s right that some of the younger officers joining now have the opportunity to reflect on how it all started and how policing has developed into what it is now.”

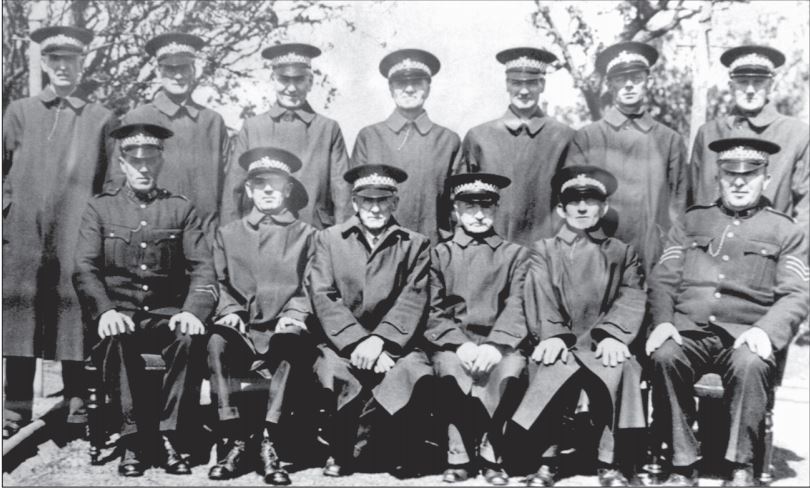
Watkins was a reserve police officer in Kincardine during the Second World War and worked alongside PC – later Sergeant – Marnoch, a legendary character in the town, due to his no-nonsense approach. The pair are pictured in a group photograph of Kincardine police force.

Mr Brodie said: “You can actually see the likeness between him and PC Murdoch, he was a big guy, probably about 22, 23 stone.”

Also on show is the belt and buckle of Constable John Marshall.

Constable John Marshall.

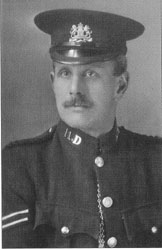
On October 26, 1920, PC Marshall responded to a disturbance in a Dunfermline restaurant involving a man in possession of a revolver.

When he gave chase the assailant shot him in the groin before turning the gun on himself.

After just nine weeks recovering, Marshall, who lived to the age of 92, returned to duty.

Another photograph has links to the discovery of the body of a young woman in a bus terminal at Rosyth Dockyard in November 1974.

A NATO fleet anchored in the Forth was due to set sail for the Arctic Circle the next day and, fearing any potential suspect may be lost, officers from Fife Constabulary and the Ministry of Defence Police boarded several Royal Navy, Germany, Dutch and French ships.

By the time the net closed in on the 24-year-old murderer his ship, HMS Rhyl, had reached Orkney, where he was arrested. The seaman was later convicted and sentenced to life imprisonment.

Superintendent William Moodie with a Royal Navy representative after the arrest on HMS Rhyl.

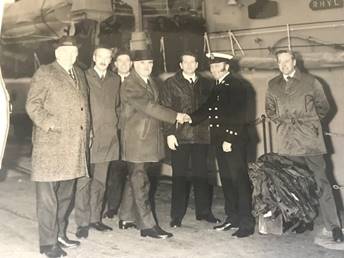
A picture of Superintendent William Moodie, who led the operation, with the then Chief Constable Robert Murison and a representative of the Royal Navy is back on show. Mr Moodie later became Chief Constable.

Sgt Laura Piercy and Superintendent Sandy Brodie with the old piano that was played for Sunday service within the Police force.

The archive is back in place thanks Mr Brodie and colleagues Sgt Laura Piercy, PCs Davie Bell and Diane Ward, Detective Constable Nick Reville, Kirsten Driscoll, Amanda Garrie and Angela Tolley.

It is not open to the general public but special visits can be arranged.