
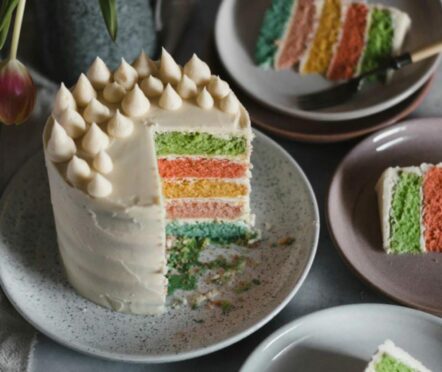
When it comes to birthday cakes, this rainbow version is sure to impress.
For those looking for a showstopper, we can’t recommend this recipe from Denby enough.
The pottery brand is known for their vibrancy and their passion for showcasing colourful and wholesome food.
As a result they have put together some colourful, “eat the rainbow” recipes and we could not resist this one for rainbow cake.
Rainbow cake
Ingredients
For 5 layers of sponge
- 5 eggs
- 250g margarine
- 185g caster sugar
- 250g self-raising flour
- 2½ tsp baking powder
- 2½ tsp vanilla extract
- Food colouring
Sponge for 2 layers if preferred
- 2 eggs
- 100g margarine
- 75g caster sugar
- 100g self-raising flour
- 1 tsp baking powder
- 1 tsp vanilla extract
- Food colouring
For the buttercream:
- 285g softened salted butter
- 510g icing sugar (sifted)
- ½ tbsp vanilla extract
Method
- Preheat the oven to 180C/160 Fan/350F/Gas Mark 4 and grease and line 5 6” inch cake tins.
- Add all the sponge ingredients to a bowl and use an electric hand mixer to beat together. Alternatively use a stand mixer. Ensure the ingredients are thoroughly mixed.
- Split the mixture into 5 equal batches and colour as you desire. I did green, 2 shades of pink, yellow and a turquoise-blue.
- Transfer the coloured mixtures into the greased tins and bake for approximately 20 minutes until the cakes spring back when poked gently. If they do not, leave for a minute at a time and keep checking.
- Remove the tins from the oven and leave to cool for a couple of minutes in the tins before turning out onto a cooling rack and leaving to cool completely.
- While the cakes are cooling you can make the buttercream.
Add the softened butter to a bowl or a stand mixer and beat for around 5 minutes on medium-high until light and fluffy.
Gradually add in the icing sugar, beating thoroughly until it is all incorporated. - Add the vanilla extract and beat until the buttercream is light and soft, ensuring you scrape down the sides.
If the buttercream is too stiff, you can add in milk a tablespoon at a time until it is the correct consistency. - To assemble the cake, first decide which order you want the colours to be in, then put a small amount of buttercream on the plate to keep your cake secure and add the first layer.
- Add a small amount of buttercream (remember you need enough for all 5 layers and the outside) and use a palette knife to spread it around the cake, allowing some to go over the sides as this can be used for your crumb coat later on.
- Repeat this with the remaining layers.
Spread any of the icing that was overlapping or that squeezed out, around the outside of the cake with the palette knife. - Add a little under half of the remaining buttercream to the top of the cake and use your palette knife to spread it over the top and ease it down the sides, scraping off any excess. This will make your crumb coat.
- Put the cake in the fridge to chill for around 30 minutes to firm up the icing.
When the cake comes out of the fridge add the remaining icing to the top of the cake and spread it around the top and down the sides to coat the cake. - If you have any remaining icing you can use a piping bag to add some decoration to the top of the cake.
Find more delicious, colourful recipes at denbypottery.com/life-in-colour-food