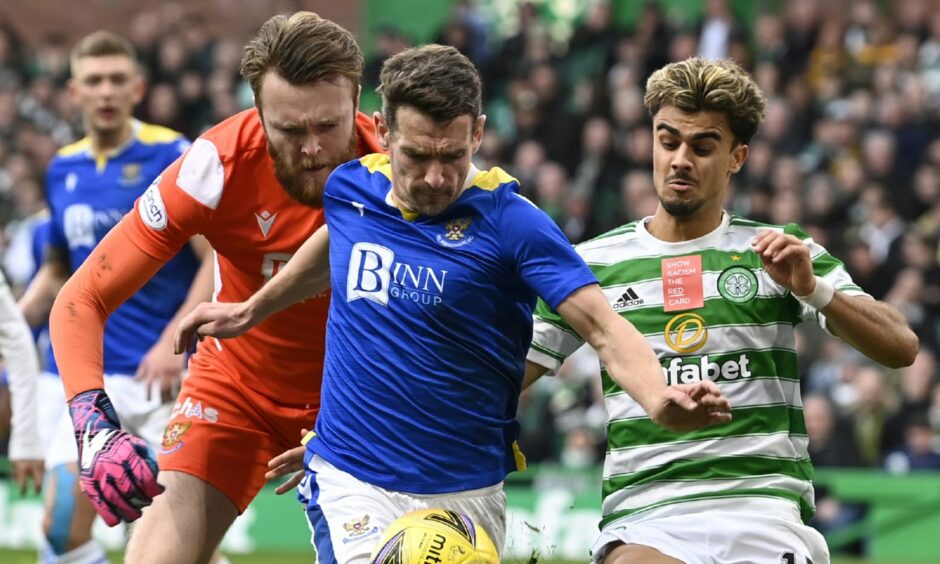
For successive fixtures it has been the proverbial game of two halves for St Johnstone.
Against Hearts last Wednesday night, Saints were forced to dig deep for a draw after going into the interval at 1-1.
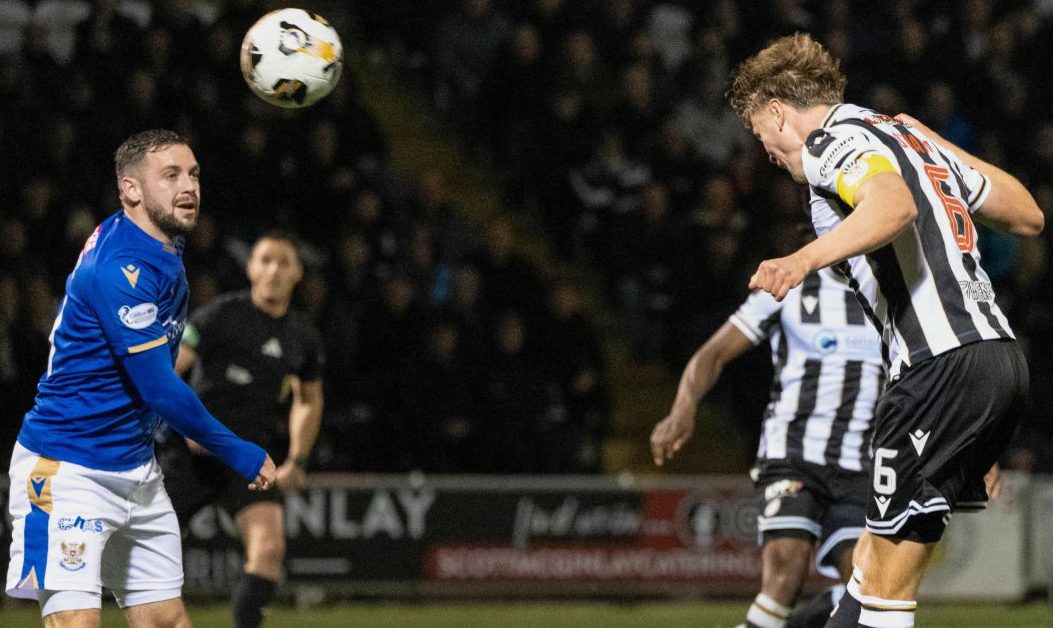
Then on Saturday, the Perth side were again fast starters at Tannadice, meriting the 1-0 advantage Ali Crawford’s 20-yard finish had earned them, before Dundee United re-emerged far stronger after the 15-minute break than before it.
This time it took some wonder saves from Zander Clark to secure all three points.
Courier Sport explores the reasons for this recent second half syndrome development and what Saints need to do to make sure it’s a short-lived issue.
Strong opposition
It’s stating the obvious to say that, in Hearts and United, Saints came up against two strong and in-form teams.
The Jam Tarts were unbeaten, while Tam Court’s men hadn’t lost in seven.
Both were/are sitting in the European places near the top of the league.
You can have a masterful tactical plan, married to the best of attacking intentions, but if sides of that quality start finding their rhythm (and in United’s case, belatedly have their best players on the pitch) any switch in momentum can be hard to reverse.
Midfield ‘legs’
This feels like a stage of the season when Saints will be looking to pick up results while several key men – mostly midfielders – either come back from injury or build their match fitness.
The three in the middle of the park against Hearts were Murray Davidson, Cammy MacPherson and Ali Crawford.
At that point, it had been over four weeks since Davidson last started a match (Aberdeen away in mid-September).
The other two are still topping up their tanks to be regarded as 90-minute performers.

As a unit, the three dropped deeper (or were pinned back).
On Saturday, with Davidson injured, MacPherson and Crawford were joined by Craig Bryson.
His ability to keep the ball, break up play and find a team-mate certainly hasn’t been lost.
You can’t expect Bryson to cover every blade of grass for a full game, though.
Saints have clever, technical players in midfield but MacPherson and Davidson are ‘the legs’.
Until they are up to full speed, there is always the possibility of it being over-powered.
MacPherson can’t play against his parent club on Saturday so Davidson’s presence will be vital to hopes of a home win.
Different themes
No two games are the same.
Saints were authors of their own struggles to sustain attacks against United. Less so against Hearts.
Put simply – their second half distribution was more effective in the first fixture.
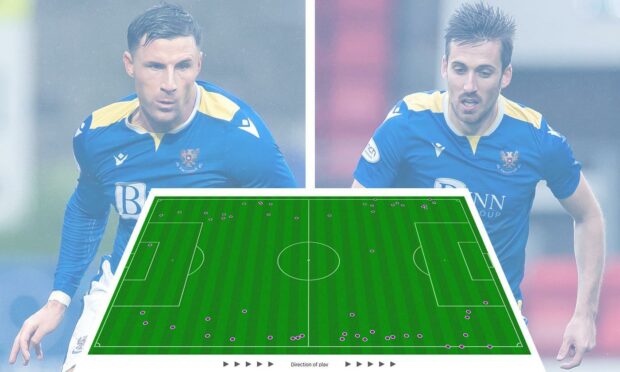
It was perhaps surprising that Opta statistics revealed Saints actually improved in terms of passing accuracy from the first 45 to the second last midweek.
There was a rise from 49.4% to 52.9% across the pitch, 39.2% to 47.6% in the opposition half and 30.8% to 47.1% in the final third.
By contrast, Perth players were coughing up possession far more after the break at Tannadice.
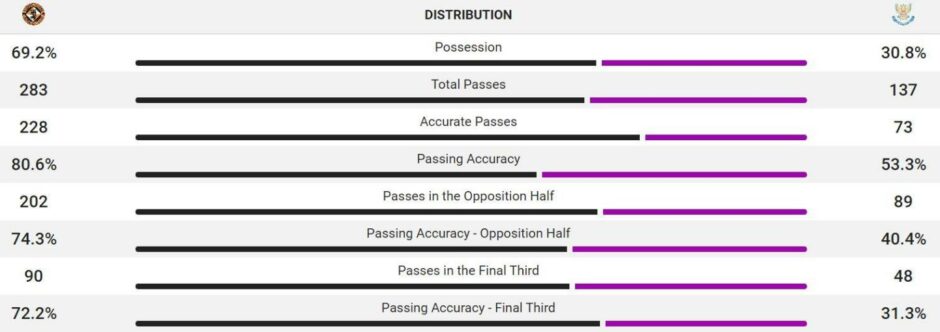
Overall passing accuracy plunged from 66.2% to 53.3%, in the opposition half from 54.3% to 40.4% and, most strikingly, in the final third from 51.7% to 31.3%.
Keeping their width
Retaining the football is a pretty self-explanatory formula for improvement and doesn’t require touch maps and number-crunching to point the way forward.
However, Opta does reveal a positional trend that is less obvious to the naked eye and that was common to both recent second halves.
One of the keys to Saints playing well is their wing-backs maintaining the team’s width.
Against both Hearts and United, the combined touch maps of Callum Booth, James Brown, Michael O’Halloran and Reece Devine show they very seldom got involved in central areas of the pitch in the opening half.
This changed, markedly, in the second.
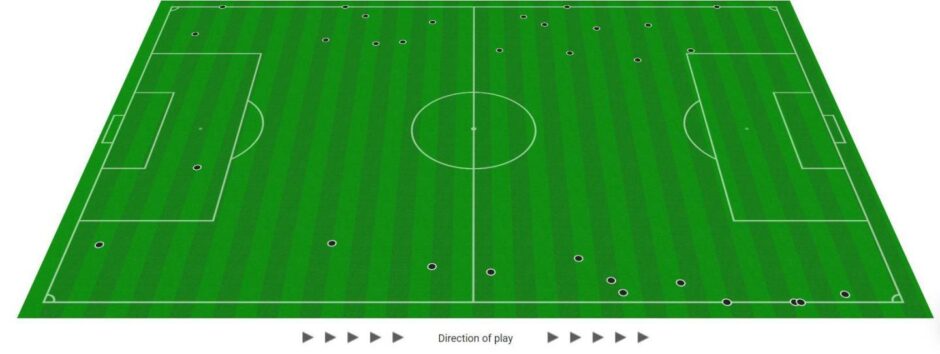


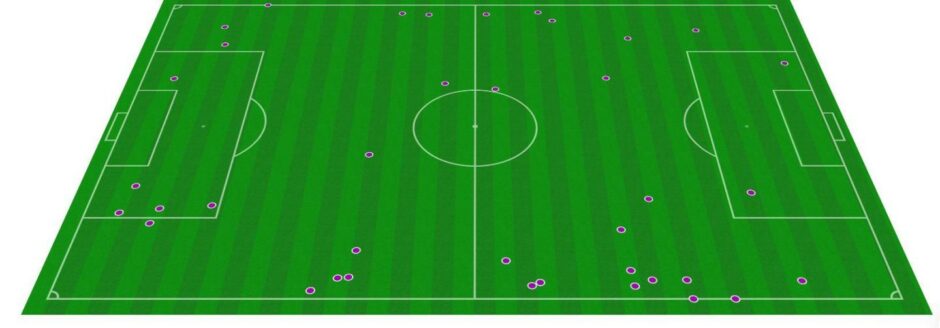
Being dragged inside helped afford more opportunities for their opponents to cross and less opportunities for Saints to get up the pitch in support of the striker(s).
Chalk on the wing-backs’ boots at full-time this weekend would be a good sign that things have gone well against St Mirren.